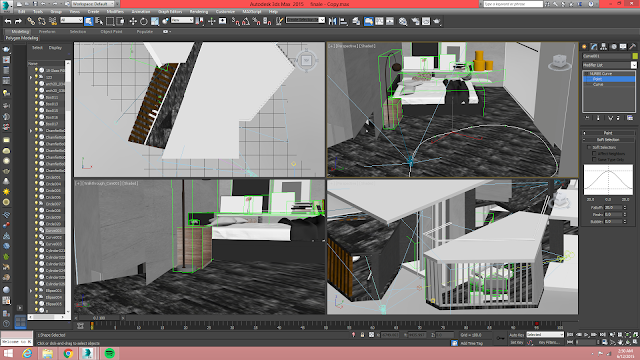
 After refining all the details, I started to create the path using NURBS Curve then go to modifier list to alter the height and location of each of the point to create the walkthrough camera's pathway.
Then, open the walkthrough assistant to assign the camera to the pathway. Then the viewport on the left bottom was switched to walkthrough camera to make sure the target of the camera was right.
Auto key was switched on to create animation frame by frame.
Time configuration was switched on to alters the frame needed for the pathway.
When all the details were finalized, I setup the render settings. time output were changed to range from 1: 100.
And output were chose as PAL video.
A destination were chose for the video output.
Then, the renderings last forever.
The other two scenes were done as the one mentioned above:
HAUNTED PART STARTS
The trunk and ballerina mannequin were downloaded seperately but later put together to form a music box according to the story line. Pathway for camera was adjusted.To create the music box effect, auto key was switched on and I rotate the ballerina in frame 60, 70, 85 to let the ballerina dance on the box.
According to the storyline another scene was set that the ballerina comes to real life. The ballerina danced to chase after the couple.
To achieve the storyline, auto key was switched on then ballerina was rotate and moved in a few frame to achieve the chasing effect.
The target of the camera and pathway were altered according to the view of the overall animation.
Go to the modifier list, the face mesh were selected to detach the head from the ballerina mannequin. And same goes to the other parts of the body, to create a creepy feeling, I guess.
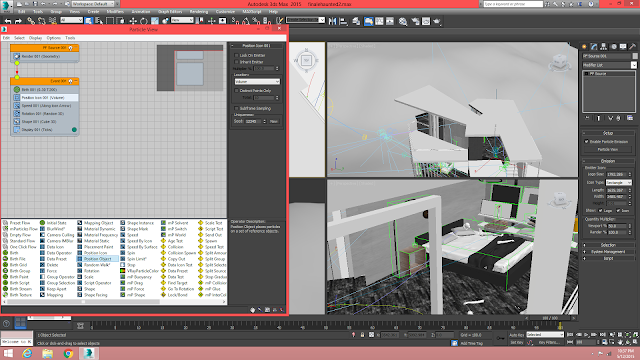
Chose particles system from the drop down menu then PF source was created. A plane was created to indicate the area of the particles drop.
Then in the modifier list, particle view were switched on.

Particle Icon were replaced by particle object.
Which is the plane created previously to fixed the area of particles drop down.
Then gravity forces were created at the bottom of the level, this is to create drop down force for the particles.
Deflector was created to make the particles drop down seems normal like the normal object.
Particles View was switched on once again to add in forces.
Then gravity was chose to put in the forces.
Deflector was chose for the collision.
LUMION : EXTERIOR
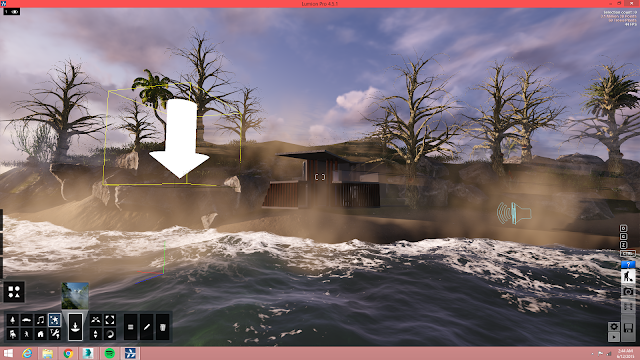
Trees suitable for island were added e.g. palm trees.
Then the land were furthur refined.
The sun location was tried and error to create the perfect shadow with the interior.
The 3DS model file was imported into the scene in lumion then scaled.
Then the materials were chosen for the model.
Haunted scene needs to create a more creepy feeling, therefore another materials needed.
Therefore wilted trees were chose to put at the island.Trees were placed on site.
Then to enhance the creepy feeling, fog was added, more like Jurassic park I guess, never watched a haunted movie so just add something I think its suitable.
Fog all around the island.
Then night scene.
Then until the movie render scene, rain was chosen.
Rain density, wind path, everything can be alters, then the animation frames were added one by one to create the movie.
Finally rendering.
MAY I PRESENT YOU, BALLERINA.
Reflection:
From this project, I realized that time management is really important because all the renderings take time, I utilized both of my comp, one specially for renderings and another one just for refining details and create pathway, camera settings, to get things ready before render.
I need to wake up in the late night a few times to check if the renderings goes well then put another scene to render so that in the morning I can do a lot more, not only renderings.
I had a lot of fun figuring out the storyline and utilised everything I learned in the lecture, I am happy with the outcome.


0 comments:
Post a Comment